
Welcome to this latest edition of our Workbench blog and all the news, updates and modelling exclusives from the fascinating world of Airfix.
It’s Workbench weekend once more and we have another selection of exclusive images, project updates and topical features for your modelling delectation. As we speed headlong towards the darker nights which are usually the ‘happy time’ for modellers and the prospect of greater modelling activity, we will be taking a look at some of the model kits in the current Airfix range which might serve as tempting build projects over the coming months, one a Cold War aviation Dog of war and the other a carrier strike aircraft which took part in the most infamous raid in history.
We will be following this up by paying a quick blog visit to RAF Manston History Museum, to check in on the progress being made on our recently arrived Hawker Hunter, before ending in now traditional fashion, by throwing the blog open to one of our talented readers and their modelling exploits. Another feature packed edition awaits, so let’s get started straight away.
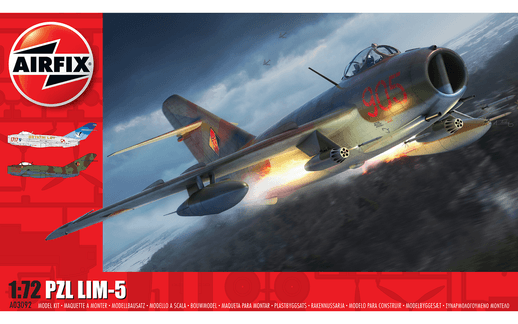
Exclusive first look at a built model sample of the recently released Lim-5 jet wearing its aggressive looking East German Air Force ground attack scheme
Due to the country’s global position within the Warsaw Pact group of nations during the dangerous years of the Cold War, the East German Air Force (Luftstreitkräfte der Nationalen Volksarmee - LSK) could always rely on being equipped with the latest Soviet aircraft types currently available during the post war years. In the event of any future conflict, the LSK would most likely be in the front line of any clash with NATO forces, so it was therefore in the best interest of the Eastern Bloc nations that they be equipped with the most capable aircraft, enabling them to repel any such incursion, or at least seriously weakening the attacking forces.
During the late 1950s, this arrangement would see the LSK receiving the first of their new Mikoyan Gurevich MiG 17 fighters from the Soviet Union, an aircraft type which would go on to become the most numerous fighter type operated by the East Germans over the next few years and one which would remain in service until 1983. Within their impressive inventory of MiG-17s, the East German’s supplemented their Soviet built machines with aircraft which had been licence built in Poland, jets which were given the designation PZL Lim-5 and were manufactured at the WSK (Polish Aviation Works) factory in Mielec, southern Poland.
An early jet fighter which built on the success of the company’s earlier MiG-15, the Mikoyan-Gurevich MiG-17 was a high-subsonic fighter designed to combat the potential threat of large scale Western bomber incursion into Soviet airspace in the early cold war years. Although not intended as a dogfighter and relying on a powerful gun armament, the MiG 17 was an extremely manoeuvrable aircraft and one which would prove to be a feared adversary for much more modern designs during the Vietnam War. It has been well documented that these aircraft caused American airmen so many problems in combat, that in the aftermath of the Vietnam conflict, the US initiated the lightweight fighter programme which would see such aviation heavyweights as the General Dynamics F-16 Fighting Falcon and the McDonnell Douglas F-18 Hornet eventually entering service.
In the never ending quest to develop aircraft possessing even greater speed, the MiG 17 design attempted to overcome the effects of compressibility by adopting an even greater sweep to its wings and was the first Soviet designed aircraft to introduce the engine afterburner, allowing pilots to access greater thrust on demand, albeit at the expense of greatly increased fuel consumption. At the other end of the aircraft, this was one of the most heavily armed fighters in the history of aviation and employed two 23mm cannon under the port side nose of the aircraft and a mighty 37mm cannon under the starboard side. This meant that the entire lower nose section of the aircraft, back to just behind the cockpit bulkhead, was devoted to either guns or their ammunition, which explains why this fighter is described by many observers as one of the last true jet powered gunships.
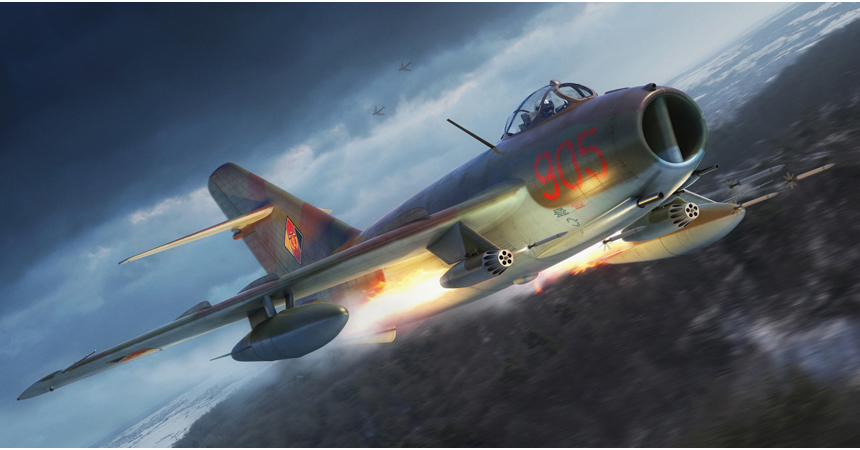
This next selection of images show the Lim-5 kit finished by Paramjit in the ground attack markings of a Polish built Luftstreitkräfte der Nationalen Volksarmee machine, markings which are dramatically different from the alternative option included with this recently released kit
Most people associate the MiG 17 and its licence built derivatives as being presented in a sleek natural metal, almost polished finish, which allowed them to slip through the air at high speed, in pursuit of NATO aircraft and indeed, the vast majority of the machines operated by the East German Air Force in an air defence role were maintained in this manner. Other than wearing the distinctive red, black and gold diamond of the Luftstreitkräfte der Nationalen Volksarmee as an identifier, the vast majority of the MiG 17F and Lim-5 fighters they operated were in a natural metal finish, but as more advanced aircraft were gradually introduced, these aircraft were required to undertake a new role, one which would see them wearing a much more sinister scheme altogether.
The images we are using to illustrate this feature all show an advanced production sample of this popular kit which has been expertly built and finished by our resident modelling supremo Paramjit Sembhi and painted in the stunning second scheme option to be included with the latest release from this tooling. Although this model is now available, we still felt this final stage of our development review was important to show, especially as this model is proving to be such a popular subject and for blog completeness. It also gives us the opportunity to look at a MiG 17/Lim-5 scheme which has to be considered one of the most attractive ever worn by this aircraft type and one which would become familiar on the majority of Eastern Bloc strike aircraft during the Cold War years which followed.
PZL Lim-5, Jagdbombenfliegergeschwader 37 ‘Klement Gottwald’ (JBG-37), Luftstreitkräfte der Nationalen Volksarmee, Drewitz Air Base, Deutsche Demokratische Republik (East Germany), 1986.
Another fascinating variant of the Mig-17 family, this East German Air Force machine was formerly used in the types more usual air defence role, but converted to combined fighter/ground support operations following the country’s adoption of the latest Mikoyan Gurevich MiG-21 fighters. Concerned at their lack of coordinated close air support cooperation between land and air forces during the early Cold War period, a Warsaw Pact directive instructed all member states to establish such forces as a matter of some urgency. The MiG 17 and Polish Lim-5 had been previously assessed in a ground attack role, but was found to be unsuitable, however for cash strapped nations such as East Germany, their recently relegated MiG 17 and Lim-5 fighters were the only suitable aircraft types available to them. In addition to this, assigning aircraft for this new role would strip squadrons of aircraft currently employed in an air defence capacity, something neither they nor the Soviet Union saw as being an acceptable situation.
Their opportunity to explore ‘creative’ options came with the widespread introduction of the spectacular MiG-21, an aircraft which had the performance to keep the West very much on their toes and the current pinnacle of Warsaw Pact aircraft technology. From the early 1960s onwards, the availability of more MiG-21 fighters allowed the older Lim-5s to be re-allocated to secondary roles and potentially, modification to perform a new one. Whilst their transition was taking place, Soviet and Polish engineers had been working on a plan to convert large numbers of the now relegated MiG 17/Lim-5 fighters to perform a fighter attack role, keeping aircraft numbers up, whilst at the same time increasing the effectiveness of their deterrent threat. Poland had been successful in producing an attack variant of the Lim-5, one which could not be described as an aircraft built for the task, but one which could do a job if required.
During the mid 1970s, all East German Air Force MiG 17 and Lim-5 jets which were still in a good state of serviceability, underwent conversion to give them a ground attack capability. These modifications included the addition of a pair of braced ordnance pylons under the inner wing root of each wing, similar to those fitted to the Polish Lim-6bis and Lim-6M fighter bombers. Omitting the brake parachute housing Polish aircraft featured, this conversion work was carried out by Flugzeugwerft Dresden, using fabricated component kits supplied by WSK PZL of Poland and would allow the aircraft to be operated with two Polis Mars-2 pods, each capable of firing sixteen 57mm unguided rocket projectiles, in addition to the jet’s already heavy cannon armament.
Operating at much lower altitudes, these ground support aircraft traded the bare metal of air defence Lim-5s for an attractive dark camouflage scheme and when beginning to show signs or weathering, these truly were some of the most appealing of the Cold War Warsaw Pact jets. Officially established in October 1971 in response to this new close air support requirement, Jagdbombenfliegergeschwader 31 (later to be redesignated JBG-37) had the distinction of being the first bomber squadron in the DDR and in their role of close air support, would never be too far away from any border hotspots. The rugged MiG 17 and Lim-5 aircraft they flew were well liked by their crews, tough and relatively easy to maintain, when flown at lower altitudes, these jets were capable of exceptional performance and could be quite a wild ride. Due to a lack of funds and the rate at which the aircraft burned additional fuel, the use of afterburner was strictly limited and only to be used in extreme circumstances.
Already a popular component of the most recent Airfix kit ranges, this latest PZL Lim-5 release includes parts and scheme/decal options to build either a test and evaluation aircraft of the Polish Air Force in a smart special disbandment scheme, or the sinister looking East German Air Force fighter bomber featured above, which really does transform the appearance of this famous early jet fighter. Thankfully, the decision on which scheme to finish your model in rests with you and we apologise in advance for making your choice a difficult one, but whichever one you eventually go for, it will make for an appealing addition to any model display. Our latest PZL Lim-5 kit release is available now.
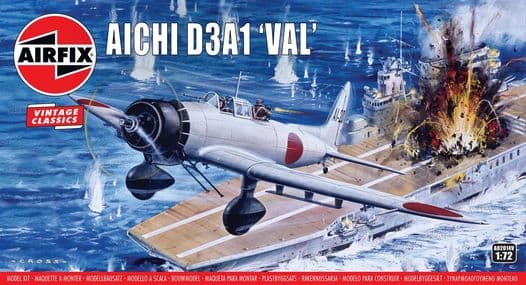
Does Airfix box artwork get any more iconic than this? Roy Cross produced this evocative artwork in 1965 and ensured that this Japanese dive bomber became an instant Airfix favourite
Throughout the rich history of Airfix, there are some kits which occupy a very special place in the hearts of millions of modellers all over the world, usually because they were popular subjects when we were first captivated by this all-consuming hobby and usually going hand in glove with a particularly impactful piece of Roy Cross artwork. One such kit was the Aichi D3A1 ‘Val’ dive bomber, a really interesting model of a less well known subject for most of us, that of Japanese aircraft of WWII, but one which was responsible for getting lots of us to stray from our more usual Spitfire and Messerschmitt subject matter. A kit which originally entered the Airfix range back in 1965, the 1/72nd scale ‘Val’ is just about to join the growing ranks of the Vintage Classics range, which is the only excuse we need to spend a little time with a model which will have had a special place in the hearts of a great many Workbench readers over the years.
The Aichi D3A1 (Allied reporting codename ‘Val’) was an extremely important aircraft to the Japanese Navy and one which occupies a significant position in the history of the Second World War. Development of the aircraft started in 1936 and in response to a Japanese Navy requirement for a monoplane carrier-based dive bomber, with the Aichi design team drawing heavily on work done in Germany on the Heinkel He70 ‘Blitz’ fast monoplane - the distinctive elliptical wing shape of the Heinkel is replicated almost exactly on the Japanese aircraft.
The prototype Aichi dive bomber first flew in early 1938, but to say this first flight was a disappointment would be something of an aviation understatement. Slow, underpowered and suffering from stability issues, the design team had plenty of work to do if their aircraft was to emerge as the one selected for full production. By the time the second prototype took to the air, the majority of the problems experienced by its predecessor had been overcome and the aircraft showed itself to have the potential to be one of the most advanced aircraft of its type in the world, immediately attracting a significant production order from the Japanese Navy. The new Aichi dive bomber would go on to become the main dive bomber of the Japanese Navy during WWII, with the type entering service in 1940.
Aichi D3A1 Val dive bomber taking off from the deck of Akagi as it heads off to target Allied shipping in the Indian Ocean
The Aichi D3A1 was armed with two fixed forward firing machine guns and a third mounted on a highly flexible arm arrangement in the rear of the fighting compartment, operated by the observer/navigator. A typical offensive ordnance load would consist of a single 250kg bomb mounted centrally under the fuselage, to be thrown clear of the aircraft’s propeller by use of a trapeze cradle, similar to the arrangement used on the German Stuka. Two further 60kg bombs could be carried on stations under the wings, outboard of the ‘Val’s’ dive breaks.
When in action, once the D3A1 had entered its attack dive, the aircraft was virtually impossible to defend against and during the early stages of the war, the highly trained Japanese crews had an excellent success rate in hitting their intended target - whether the bomb they released actually exploded as intended was another matter entirely. The pilot was armed with a telescopic sighting optic ahead of his windscreen, which he would use to aim his bomb during the attack dive, with the attack phase itself exposing the crews to incredible G forces, which required their training to include a high degree of physical fitness. Having to withstand forces in excess if seven times gravity, there was always the very real danger of G induced blackout during both an attack dive and the recovery, in the certain knowledge that should this happen, both the aircraft and its crew would not survive the situation.
The moments following recovery from a steep attack dive were the most vulnerable for a ‘Val’ crew, as both the aircraft and its pilot attempted to gather themselves following the disorientation of these brutal attack dives. These dangerous seconds made the dive bombers extremely vulnerable to attack, something which was quickly pounced upon by US Navy fighter pilots and gun crews aboard their ships - whether it was before of after it had made its attack dive, a destroyed Japanese dive bomber was one less able to torment US Navy crews in the many battles to come, as the battle of the Pacific raged on.
A02014V - Aichi D3A1 ‘Val’ AI-20I, Based aboard carrier Akagi, Pearl Harbor Operation, December 7th 1941.
The Aichi D3A1 began operational carrier trials aboard the Imperial Japanese Navy carriers Akagi and Kaga during 1940, with many of the assigned crews working the type up destined to play their part in one of the most devastating raids of the Second World War and arguably the most significant action in determining the ultimate outcome of the conflict, the Pearl Harbor raid. Considered the most advanced carrier borne strike aircraft in the world at that time, service acceptance and further training in an area which closely resembled the topography of Oahu and the Pearl Harbor complex must have led crews to realise they were destined to play a significant role in future world history.
For naval commanders, the threat posed by effective and well flown enemy dive bombers was significant and they were considered the most lethal maritime denial weapons they would have to face during any conflict. This was because the attack runs of torpedo bombers had to be made at low altitudes, where they were much more vulnerable to defensive fire and the targeted ship had at least the possibility of evading the torpedo, or destroying it prior to or during its run to target. With a dive bomber, once the aircraft had entered its dive attack, there was very little the ship could do about the situation, other than watch and hope. Even if the aircraft was hit by anti-aircraft fire or its crew black out during the dive, if the attack profile was executed correctly, the aircraft and its bomb would still hit the target vessel, potentially inflicting significant damage to the ship and numerous casualties along with it. Despite the fact that the Aichi D3A1 had no internal bomb carrying capability, it would prove to be a devastatingly effective weapon and a significant aircraft in the Japanese Navy’s inventory.
The Aichi D3A1 ‘Val’ has the distinction of being the first aircraft to drop bombs on US targets in the Second World War and after the Pearl Harbor raid, would go on to be at the forefront of every major Japanese carrier operation for the ten months following the raid, including the Battle of Ceylon, where the Japanese Navy scored a victory against the Royal Navy by sinking a light carrier, two heavy cruisers and two destroyers. The ‘Val’ would be responsible for sinking more Allied shipping than any other Axis aircraft during WWII.
As this coming December will see the world marking the 80th Anniversary of the Pearl Harbor raid, the incredible details behind this infamous attack will once again be coming under scrutiny, with historians and observers discussing the facts and the ‘what ifs’ behind one of the most famous actions of the Second World War. As the Japanese Task force steamed towards the island of Oahu in strict radio silence and whilst diplomatic negotiations were still ongoing, the operation required the element of complete surprise if they were to strike the devastating blow they were hoping for, effectively removing the US Navy from having the ability to challenge their Pacific operations for the foreseeable future.
Full scheme details of a Vintage Classic release which will be an extremely welcome addition to the range
It could be argued that the world had seriously underestimated the effectiveness and the desire of the Japanese Navy in the lead up to the Second World War, something which would see then scoring some spectacular victories during this time. As the task force headed for Pearl Harbor in November/early December 1941, it was by far the most powerful carrier task force ever assembled, consisting of 67 vessels, including 6 major strike carriers equipped with over 420 aircraft of all types, fighters, torpedo strike aircraft, level bombers and dive bombers. The force commander Vice Admiral Chuichi Nagumo has been described as a cautious commander and was under strict orders to abort the mission should his force be detected, or in the unlikely event that diplomatic negotiations succeeded, but as they were now less than 300 miles from the island of Oahu in the early morning of 7th December 1941, he knew the strike would be taking place.
Just before 06.00 and whilst still in darkness, the six aircraft carriers began the launch procedure for the first of three planned strike raids, clearing their crowded decks of 183 aircraft of all types. This first strike force consisted of 49 level bombers, 40 torpedo aircraft, 51 dive bombers and 43 fighters, with just a handful of aircraft failing to take off due to technical issues. The launch process took around 15 minutes to complete and as the force formed up and headed for Oahu, the frenetic activity aboard the carriers did not abate, as the second strike wave of aircraft were immediately prepared for launch.
The aircraft strike leader was still unaware of what reception his airmen would receive over the American military facilities at Oahu, but the element of surprise was crucial to their success. By 07.40, the aerial armada had reached the island and all appeared to be quiet. The attack leader fired a flare from his aircraft, the signal for all aircraft to assume their attack positions, which all strike aircraft immediately did. Unfortunately, the fighters flying at higher altitude had not seen the signal due to cloud, so he fired a second flare once he could clearly see them. This second flare was mistaken for the signal that the attack had been detected by American forces on the island by the dive-bomber leader (two flares fired in quick succession indicated the force had been detected) and his aircraft immediately launched their attacks on Ford Island and Wheeler Field. At 07.55, the attack against Pearl Harbor began and this sleepy Sunday morning on a paradise island turned into hell on earth.
A combination of Airfix old and new, the classic 1965 Roy Cross Aichi D3A1 Val artwork married with the current Airfix box layout style
One hour after the first strike raid was launched from the six Japanese carriers steaming off the coast of Oahu, the second raid was launched during the first light of day, with these aircraft knowing that when they arrived over the island, they would be greeted by a scene of devastation and possibly island defences which were now in full operation. This raid consisted of a further 171 aircraft and was made up of more dive bombers and no torpedo carrying aircraft. This second strike force was made up of 54 level bombers, 81 dive bombers and 36 fighters, all of which arrived at their designated rendezvous location above Kahuku Point on the north of the Island at 08.40, to be unleashed on the attack 14 minutes later.
With the aircraft from the first raid on their way back to the task force to refuel and rearm for an anticipated third strike, it is interesting to note that even though they had just taken part in what they had hoped to be the most devastatingly effective aerial strike in the history of warfare, a handful of senior flight commanders were ordered to not only fly over the carnage to assess the damage, but also to head for pre-determined ‘muster points’ over the island, to collect stray fighters which were in need of escort back to the carriers. The fighter pilots were unable to navigate over open expanses of water and if they were to make it back to the task force successfully, they would have to be led back by the larger aircraft with a dedicated navigator on board and it seems that quite a number of Zero fighters needed to be collected in this manner. By 10.00, all remaining Japanese aircraft were heading back to their home carriers, leaving a scene of sheer devastation in their wake and a shocked American nation.
A truly historic image showing Aichi D3A1 Val dive bombers on the deck of the IJN carrier Akagi on the morning of the Pearl Harbor attack, 7th December 1941
The carrier Akagi had a significant role to play during the Pearl Harbor attack and was the flagship for the raid, the vessel on which Vice Admiral Chuichi Nagumo was situated. The carrier would launch two strikes during this infamous raid, the first leaving its decks at around 06.00 and consisting of 27 Nakajima B5N ‘Kate’ torpedo strike aircraft assigned to attack American ships in Battleship Row and 9 Mitsubishi Zero fighters sent to attack Hickam Field - a further three Zeros carried our combat air patrols, protecting the attack force against potential enemy air attack.
The second attack wave from the carrier saw no torpedo aircraft launched, but 18 Aichi D3A1 ‘Val’ dive bombers sent to attack the battleships Maryland and Pennsylvania, along with other secondary targets, with a further 9 Zero fighters sent to continue the strafing of American airfields on the island. As the first attack wave began landing back on their carriers, the initial plan was for them to be refuelled and rearmed, before embarking on a third raid to hit targets not destroyed by the previous attacks, most noticeably, dry docks and fuel storage facilities. Despite the fact that the flight commander was adamant that this raid must be launched, the conservative Nagumo feared detection and attack by the Americans and ordered an immediate withdrawal of his forces - was this one of the most disastrous military blunders of WWII?
We have purposely avoided describing the devastation which befell Oahu and Pearl Harbor on that fateful day and the heroism displayed by so many people who were completely unprepared for the carnage which they were forced to endure, however, this day would eventually bring America into the war and turn public opinion which had been against conflict to a nation determined to secure victory. Perhaps the most telling statistic of the raid is that even though the Japanese only lost 29 aircraft during the raid itself, only one of the Japanese ships which took part in the Pearl Harbor raid would still be afloat at the end of the war.
A true Airfix kit classic, our Aichi D3A1 ‘Val’ kit with its stunning original Roy Cross box artwork is an impending addition to our Vintage Classics range and should be available in model stores and on the Airfix website in time to mark this year’s 80th Anniversary.
Taken during the assessment visit to Fort Paull in April this year, Hawker Hunter F.6 XF509 would soon be winging her way to a new home much further south
This year has not only been a significant one for scale versions of classic aircraft as far as the Airfix brand is concerned, but also for a particular ‘full size’ aircraft as we welcomed a high profile aviation classic back into the Airfix fold. In a development which attracted significant media interest, Hawker Hunter F.6 XF509 which stood for a number of years outside the Airfix/Humbrol factory site on Hedon Road, Marfleet in Hull, was secured at auction by our CEO Lyndon Davies, as its current home at the Fort Paull Museum had changed ownership and was destined for a change of use. Throughout the course of the year, we followed the process of assessing the aircraft and preparing it for its move to Kent and the actual dismantling and transportation procedure itself, also reporting on an eleventh hour change to its delivery destination, which was to be in the care of the good people at the RAF Manston History Museum. As we recently had the opportunity to visit the aircraft at Manston, we thought readers might like a little update on a project which means so much to everyone here at the company.
Hawker Hunter F.6 XF509 enjoyed a long and varied flying career with the Royal Air Force, initially serving with No.54 Squadron, before going on to serve with the Air Fighting Development Squadron and the Royal Aircraft Establishment at Bedford. She would also spend time as a chase aircraft with the British Aircraft Corporation at Filton, before being assigned to No.4 FTS at RAF Valley and a lengthy period in a flight training role. She would end her RAF service as a plinth mounted gate guardian at the entrance to RAF Chivenor.
The closure of RAF Chivenor resulted in a rather unusual new assignment for Hunter XF509, as she was purchased by the owners of the Airfix/Humbrol company and moved to their factory site in Hull, where she was to serve as a rather impressive and quite unique ‘Factory Guardian’, in a position where she was clearly visible for traffic using the main A1033 road. Once again plinth mounted, she became a much-loved local landmark in the Humberside region, displayed on the same plinth on which it had been mounted at RAF Chivenor, in dramatic flight configuration and showing of the beautifully clean lines of this classic British aeroplane. Unfortunately, difficulties experienced by Airfix soon after and the eventual closure of the Hull site saw the Hunter falling into disrepair and even suffering at the hands of local vandals, an extremely sad sight for anyone who had seen the aircraft resplendent in her former glory. Thankfully, the aircraft was rescued in the mid 2000s and transported to the nearby Fort Paull Museum, where it received some much needed TLC and a new coat of paint - she was also once again mounted on her former RAF Chivenor display plinth, one of a number of fascinating former military exhibits.
With protective sheeting all around her, the Airfix Hunter is about to undergo the next stage in her renovation and the removal of years of grime and several layers of paint
In her current state, it is quite easy to see links to the aircraft’s past, including this 4FTS red used during her time at RAF Valley
We couldn’t resist a quick trip across the airfield to look at some of the magnificent exhibits on display at the RAF Manston History Museum
With the aircraft having such a connection with the Airfix brand, it is somehow fitting that she has now renewed those ties and her future seems much more secure under her current ownership. Since arriving in the care of the Manston Museum team, the aircraft has been placed on her main undercarriage legs, with the nose gear still proving a little reluctant to extend - a tower of pallets and old tyres is currently providing a suitable support whilst this particular problem can be overcome. She has been kept in a hangar since arriving at Manston, giving her a welcome respite from the rigors of the Humberside weather, allowing her to dry out in advance of the next stage in her restoration. The Manston team have now erected a sheeted scaffold cage around the aircraft, as the exciting next stage in her restoration fast approaches.
The first major work to take place on XF509’s preservation will be the removal of all existing paint from the airframe, a process which must be done sympathetically and in an environmentally friendly manner, before a detailed analysis of the aircraft can be carried out. Once dry and with all surfaces cleaned, the entire aircraft will be given an undercoat primer, which once dried, will be ready to accept the main scheme we intend to finish the aircraft in. We have been doing quite a bit of work on this important subject and whilst we are not in a position to bring you these details just yet, we hope to be able to in the very near future. It will also be interesting to see just how many pots of Humbrol paint will be needed to finish a full size Hawker Hunter!
There are still quite a number of issues to be resolved regarding the renovation and long term location of the Airfix Hunter, but as soon as we are in a position to do so, we look forward to bringing you these details. The next update should include pictures of the stripping, cleaning and undercoat application processes, before we get on to the really interesting subject of applying the paint scheme and markings to our Hunter, something we very much look forward to including in a forthcoming edition of the blog. Until then, we hope you have enjoyed being kept up to date with this exciting Airfix project. If you would like to make your own scale modelling tribute to this Airfix Hunter homecoming, our 1/48th scale Hawker Hunter F.6 kit actually includes scheme and decal options to finish your model as XF509, during her RAF Valley 4 FTS days.
Alan Bean could not ignore the beautiful artwork adorning the boxes of his Airfix kits, do decided it incorporate them into some of his build projects
Over the course of publishing over six years of Workbench blogs, our worldwide readership has made it abundantly clear just how important the box artwork which has graced our kit boxes over the years actually is to modellers and how the latest breed of digital artwork is impressively continuing this proud legacy. Editions of the blog which exclusively showcase the latest box artwork releases remain amongst the most popular in any year and when our Vintage Classics model reviews include the original artwork of Roy Cross, we are all immediately transported back to the modelling days of our youth. With artwork being such an important part of the Airfix story, we were fascinated to see an enthusiasts social media post by Alan Bean and how his love of Airfix box artwork had led him to finish some of his model builds in a particularly impressive manner, so we just had to give them some blog exposure.
An avid modeller for many a year, Alan described how Airfix box artwork was not only the reason why he would select a particular kit as his next build project, but also how the image would serve as inspiration throughout the build, particularly when it came to painting the model. With this being the case, he thought that there must be something a little more creative he could do with this association and began thinking how he could combine the two in a single modelling display. His solution did take some time to perfect and increased the overall build time for each project, but did add some real impact. Taking the finished model and attempting to use this as the centrepiece of a three dimensional version of the artwork, Alan managed to create scenes which were instantly recognisable to any modeller, whilst at the same time being an impressive standalone display piece (our words, not Alans).
Arguably one of the most famous pieces of artwork in the history of modelling, Alan attempted to replicate the fiery homecoming of Avro Lancaster ‘G for George’ in this diorama build, something he managed in some style
Ranging from model builds simply mounted on a picture frame with the box artwork as a backdrop, to a full diorama background built to replicate a box artwork scene, Alan managed to produce something which not only showcased his modelling skill, but also his vision and artistic application. A scene which will be familiar to tens of thousands of modellers is the classic box artwork created by Roy Cross and used on the release of the 1/72nd scale Avro Lancaster B.Mk.I/III kit and first seen in 1967. The artwork shows Avro Lancaster Mk.I W4783 ‘G for George’ of No.460 Squadron RAAF returning to its home base at Binbrook, shot up and with her port outer engine ablaze, as she overflies the flight control caravan, with its occupant coming out for a closer look at the scene. In the annals of Airfix box artwork, this has to be considered one of the most iconic ever produced and has been beautifully replicated by Alan in this stunning diorama display piece.
Moving on to something a little more out of this world, but equally evocative from an image perspective, how many Workbench readers will own up to adding the 1.144th scale Apollo Saturn V rocket kit to their stash, simply because the box artwork was so appealing? Well, Alan had a go at replicating this kit as well, producing a diorama build which is equally as impressive as his Lancaster and arguably even more dramatic from an aesthetic point of view. When his dioramas have been displayed at model shows, Alan described how they always get plenty of attention, however, he modestly puts that down to the artwork rather than his modelling skill. Airfix fans instantly recognise the scenes on display and are drawn to them because they are so familiar and bring back such pleasant memories for them - whether they inspire them to have a go at attempting a similar build project is open to debate, but they are always a conversation starter.
Blasting off its display stand, Alan’s Apollo Saturn V rocket diorama is arguably his most impressive recreation to date
Alan told us that as a modeller, he would actually describe himself as being a straight from the box type of modeller in the main, but how some Airfix box artwork just inspires him to go that modelling step further. The only problem he has is that with so much amazing Airfix box artwork out there, choosing which one to base his next project on can be a real challenge. Unfortunately Alan, we will have a host of new artwork to bring you following the release of the 2022 range and we are just about to make that choice a little bit harder.
We hope you enjoy seeing Alan’s box art representations as much as we did and would like to thank him for both sending us these pictures and for allowing us to include them in the Airfix blog - we can’t wait to see what he comes up with next.
We are afraid that’s all we have for you in this latest edition of Workbench, which we hope you found to be an enjoyable read. As always, if you have any suggestions for particular subjects you would like to see covered in a future edition, please do drop us a quick line, using this workbench@airfix.com link to contact us.
In between new editions of our blog, the Airfix conversation continues over on our Airfix Forum Workbench thread, with further discussions taking place on our official social media platforms - Airfix Facebook, Airfix Twitter and Airfix Instagram – please do get involved in the discussions and let us know what you think about Workbench.
Whenever you decide to visit, the Airfix website is always the place where you will find all the latest model availability information, a comprehensive round-up of previous editions of our Workbench blog, access to helpful modelling tips and much more.
The next edition of Workbench is scheduled to be published on Friday 15th October.
Thank you for your continued support of our Airfix blog.

